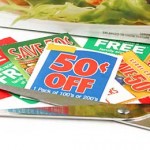
So you want a coupon binder, but you don’t want to spend $20-30 to purchase one? No worries! You can make one yourself for less than $9 this week when you take advantage of back to school deals! The binder method is not for everyone and this will give you an opportunity to check it out without investing a lot of money if it doesn’t work for you!
Here’s the breakdown on the basic supplies you’ll want to purchase and the best deals I found this week:
-1″ Vinyl Round ring binders – $.50 at Office Depot this week
-Corner Office sheet protectors (10 ct) – 2/$1 w/ in ad coupon at Walgreens this week
-Corner Office or Wexford dividers – 2/$1 w/ in ad coupon at Walgreens this week
-PaperMate Write Brothers pens – $.29 w/ in ad coupon at Walgreens this week
-Penway or Wexford Carryall Pouch – 2/$1 w/ in ad coupon at Walgreens this week
–25 Ultra Pro 9 Pocket Page Protectors for Baseball Cards – $5.82 (if you haven’t checked out Amazon Mom yet, you can sign up for FREE here and then you will get 2 day Prime shipping for free for 90 days!)
-Scissors – $.79 after $1 off Scotch coupon at Target
*You might also want to invest in a small calculator. My Dollar Tree stores carry them and you may also be able to find them in the school supply section at Walmart for cheap.
Putting it all together:
1. Keep your vinyl pouch with pens, a calculator, and scissors at the front of your binder for easy access
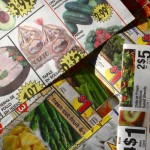
2. Use your dividers or page protectors to create categories for organizing your coupons. You can also use the page protectors for storing the weekly ads and your store’s coupon policies. When deciding on what categories to use, it’s really a matter of trial and error and figuring out what works best for you. When I first started, I was very broad and then, I ended up moving to very specific categories.
Here are some suggestions for sections in your binder:
-Store coupon policies (print these out and keep them at the front of your binder for easy access)
-A section for ECBs and RRs (again, I would keep these at the front for easy access, but that’s just my preference)
-Weekly store ads (you can either keep these in the side pocket if your binder has one or in page protectors)
-Categories for your coupons
*Baby care (if applicable)
*Groceries (this includes baking items, beverages, canned goods, dairy, frozen foods, meats, produce, snack items, etc. – when I used the binder method, I broke this down into smaller sections so I could find things easily)
*Health Care (this is things like band aids and over the counter medicine)
*Household (this would be things like cleaning supplies and paper goods, so you could break this down even more if you prefer)
*Personal Care (this is things like toothbrushes, toothpaste, deodorant, shampoo/conditioner, make-up, and razors – when I used a binder, I always found it easier to break this down into smaller sections so I could find what I was looking for easily)
*Pets (if applicable)
Pros of the “binder” method:
-You always have all of your coupons when you need them!
-If you have well-organized categories, it’s easy to locate coupons
Cons of the “binder” method:
-It’s time consuming to clip and organize all of your coupons
-It can be bulky to carry around and can be difficult to keep track of if you’re trying to wrestle with kids and plan our your coupon trip, too!
The KEY to successful couponing is finding an organization system that works for you! If you don’t think a coupon binder is for you right now, check out my post here on how you can get coupon organizers for just $1 at Target right now!

*This post may contain affiliate links. Please refer to my disclosure policy for more information